I am a great fan of food that looks utterly pretentious but is actually laughably easy to create. Crème Brûlée is one these ridiculously simple desserts you can prepare the night before but always thrills your guests because they think you've pulled it out of thin air.
The only thing that makes it moderately challenging, as is the case whenever you're heating egg yolks, is to keep the eggs from scrambling. However, with some attention, I see no reason why this should present any difficulty.
Apparently, according to Julia Child, bless her soul, France, Britain and Spain all lay claim to inventing this dessert, but as she also provides an extremely questionable recipe for it, I'm sure she'll forgive me if I don't take her word for it.
If you look for a creme brulee (it's too pretentious to keep including the accents - my food is only slightly so) recipe on the internet or in cookbooks, you'll often find some rubbish like lavender creme brulee, or coconut-infused creme brulee. Creme Brulee is one of those triumphs of traditional cuisine that people shouldn't muck around with. Give me vanilla or give me death.
This recipe is very similar to the ones Debbie Puente (apparently the queen of creme brulee) and Michael Chu provide, with a few slight modifications to suit my delicate Asian palate.
I find that 8 egg yolks sometimes imparts a very eggy smell, and makes the creme rather too yellow. You could use 6, if you're very cholestrol conscious, but I find 7 is a good balance. Most recipes call for about 8 yolks to 2 cups (500ml) of cream, so be wary of any recipe that strays too far from that benchmark. 2 cups of cream is usually too rich even for me, so I usually use 200ml of cream and 200ml of milk. For a slightly richer option go with 250ml cream and 200ml milk. Experiment and find a ratio that suits your tastes and health regime.
Ingredients
7 egg yolks
400ml pure/whipping cream (>35% milk fat) - see above
80g sugar, separated
2 vanilla pods (which can be purchased from Phoon Huat)
This serves about 4 people, or 6, if you use smaller containers.
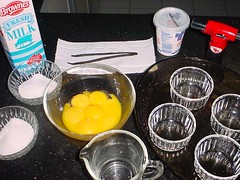
There's your meez, but I forgot to include a sieve and a whisk, both of which are instrumental to a good creme brulee.
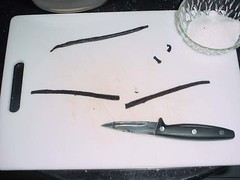
The first thing to do is to remove the seeds from your vanilla pods and add them to half of your sugar. To do that, you cut off the ends of your pods and split them lengthwise, then scrape out all the seeds. Try not to waste a single seed, because vanilla pods are hard to come by.
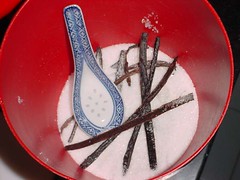
Naturally you don't throw your pods away - use them to dramatically enhance the flavour of your sugar. A trick from Jamie Oliver.
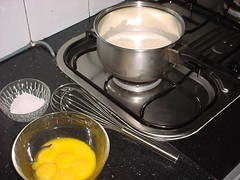
Once you've done that, heat your cream (or cream and milk, or half and half) and vanilla sugar over very low heat and have your egg yolks and remaining sugar handy. On no account let your cream come to a boil!
While your cream is heating gently, whisk your sugar and eggs until the mixture is pale yellow and, according to Julia Child, bless her soul, "forms the ribbon".
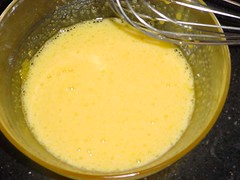
Since I still have no idea what she means by this esoteric phrase, I shall settle for a pale yellow mixture, ribbon or otherwise.
By this time your cream should be close to, but not, boiling. Remove it from the heat and pour some hot cream into your egg yolk mixture, whisking it in.
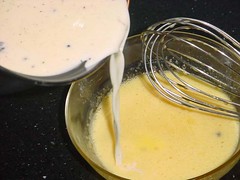
This is known as tempering your egg yolks, or bringing it up to the temperature of your cream, so that the eggs don't scramble when you pour them in. This is always necessary when you're trying to thicken something with egg yolks. I've never actually tried pouring the yolks into the hot cream without first tempering them, but if anyone would like to try, I am most interested in the results.
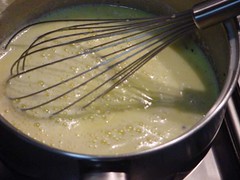
Pour the egg mixture back into the cream and return it to the heat, as you continue whisking. The mixture should start to thicken after a minute or two. Its thickness depends, of course, on how many yolks and how much milk you've decided to use. Allow me to reiterate, do not let it boil!
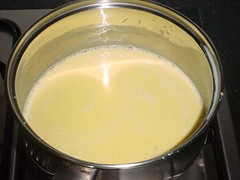
Once the custard has thickend, remove it from the flame. It should now be very pale yellow, almost off-white.
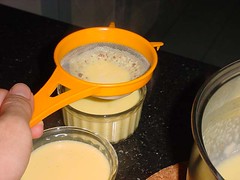
At this point you'll want to strain your custard into individual ramekins, which drastically improves the consistency of your creme brulee, as many of the vanilla seeds will have congealed.
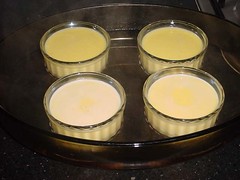
Place your ramekins in a bain-marie (water bath), with water reaching up to 1/3 the sides of the ramekins. Most recipes specify halfway up the sides, but I find that this inhibits the setting of the creme brulee. Use whatever works for you. Don't worry if the first two are paler yellow than the others - once the top has been caramelised, no one can tell.
Bake, in a preheated 160-170C oven, for about 40-50 minutes. There seems to be some leeway with the amount of time it takes for the creme brulee to set; durations range from 30 minutes to an hour. You're aiming, ideally, for almost the whole creme to set, but the centre should remain jiggly. However, since this world is not perfect, as long as your creme has set (probably within the 30-40 minute timeframe), you should be okay.
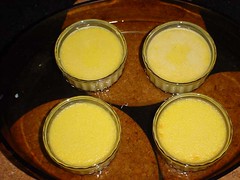
Remove your water bath from the oven and allow the creme to cool down in the water bath. Once they have reached room temperature, remove the ramekins from the water bath, dry them, cover them and pop them in the fridge.
There should be photos here of the caramelisation process, but as Xiaozheng rather brilliantly forgot to bring his camera and mine is still out of action, you, my loyal readers, have been deprived of being able to witness this remarkable process
10 minutes before they are to be served, remove them from the fridge, dust a layer of brown sugar over each one (about 1 tsp each). Using a blowtorch (which you can obtain at any DIY shop), blast the hell out of the brown sugar, until it bubbles and caramelises, but does not turn black.
Chill for a few minutes before serving.
Creme Brulee does not keep well, so you'll want to finish whatever you've made within one or two days
Technorati Tags: Recipes, Creme Brulee
No comments:
Post a Comment